Filter
- Hosting: Shared hosting or VPS hosting (with SSH access) with cPanel or similar control panel.
- Laravel Framework : Laravel 10 requires
- PHP Version : 8.2.X.
- Database: MySQL 8.X or higher, or MariaDB 10.3 or higher.
- Node.js: Required to run frontend build commands (e.g., compiling assets with Vite, Webpack, or similar).
- Built using Laravel 10, so make sure PHP, database, and required PHP extensions are installed.
For permissions on Ubuntu or macOS, follow the steps below to set the correct permissions:
-
sudo chmod 775 .env
Gives the owner and group read, write, and execute permissions for the
.envfile. Others can only read and execute. ⚠️ Normally,.envdoes not need execute permission; you may also use644for better security. -
sudo chmod -R 775 bootstrap
Recursively sets read, write, and execute permissions for the owner and group on the
bootstrapdirectory, which Laravel uses for caching. -
sudo chmod -R 775 storage/framework
Ensures Laravel can write cached files in the
storage/frameworkdirectory. This is required for sessions and compiled views. -
sudo chmod -R 775 storage/logs
Allows Laravel to create and update log files in
storage/logs.
Set Up
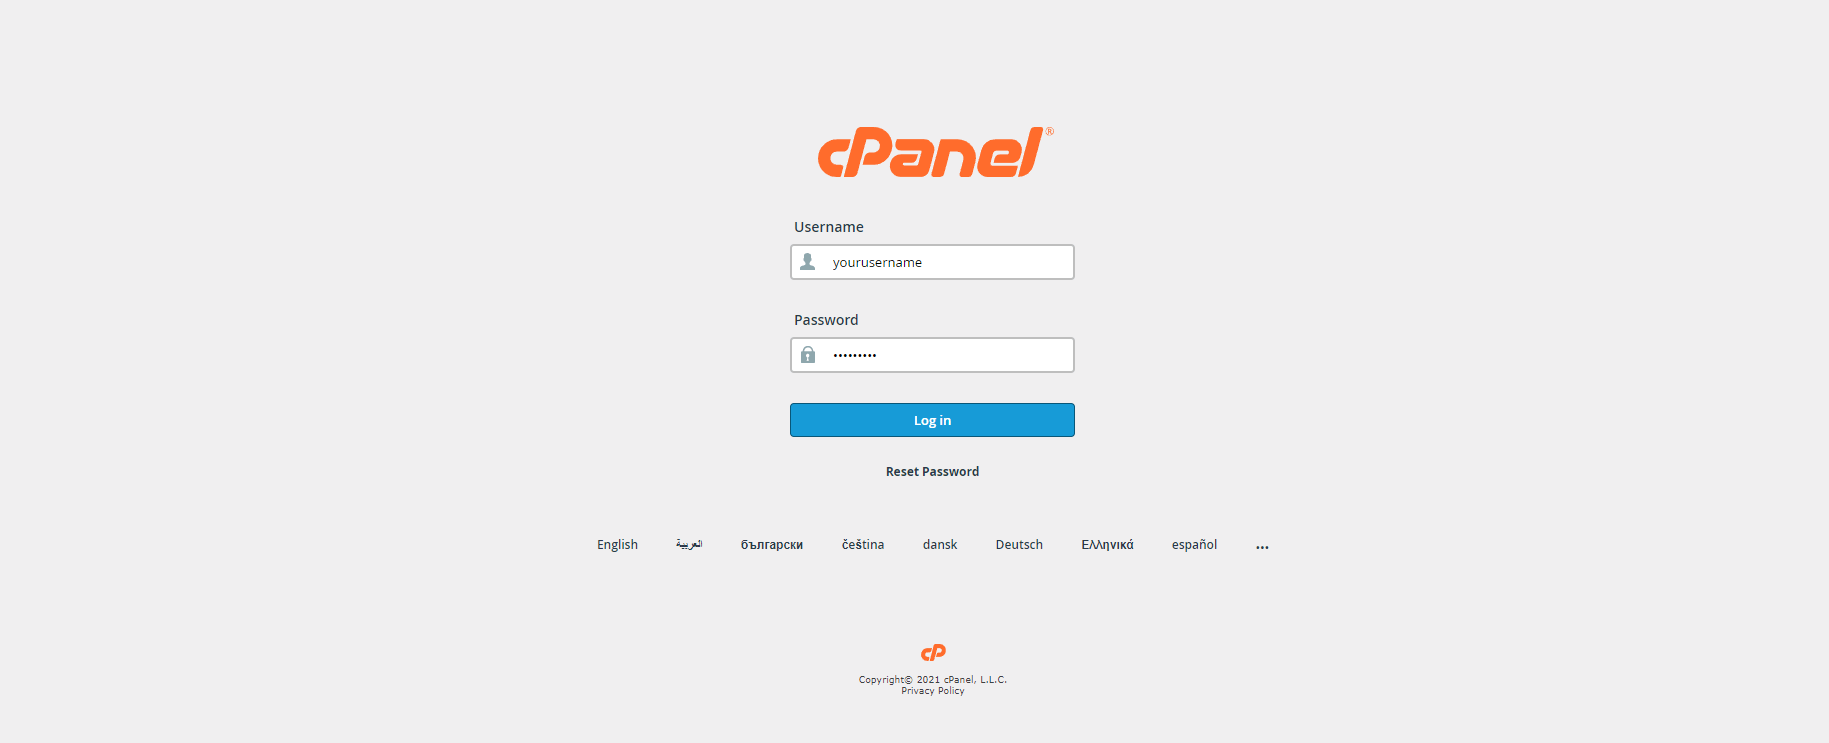
1. Login into your cPanel.
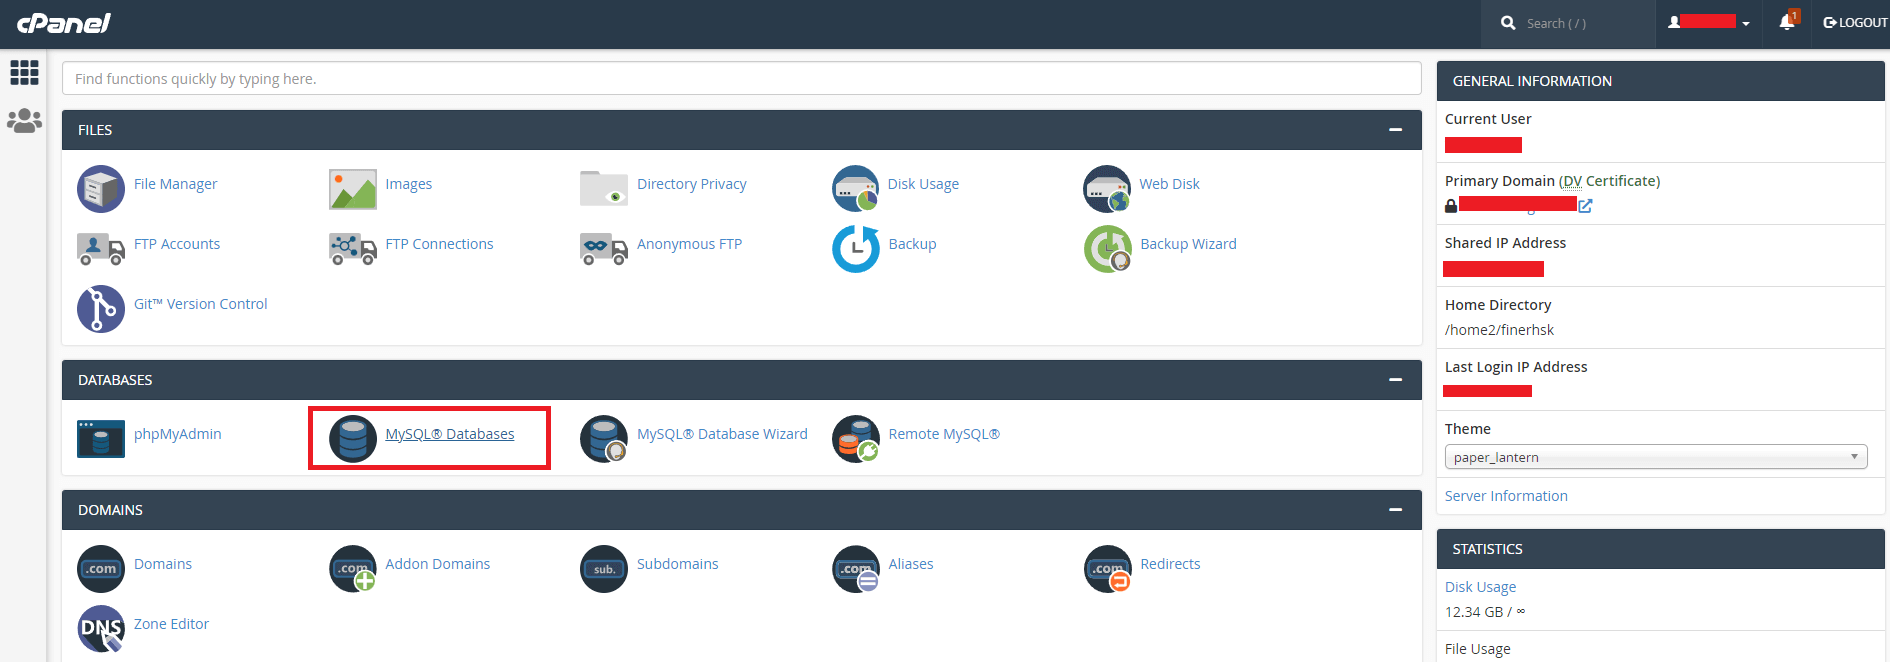
2. Go to database in your cPanel.
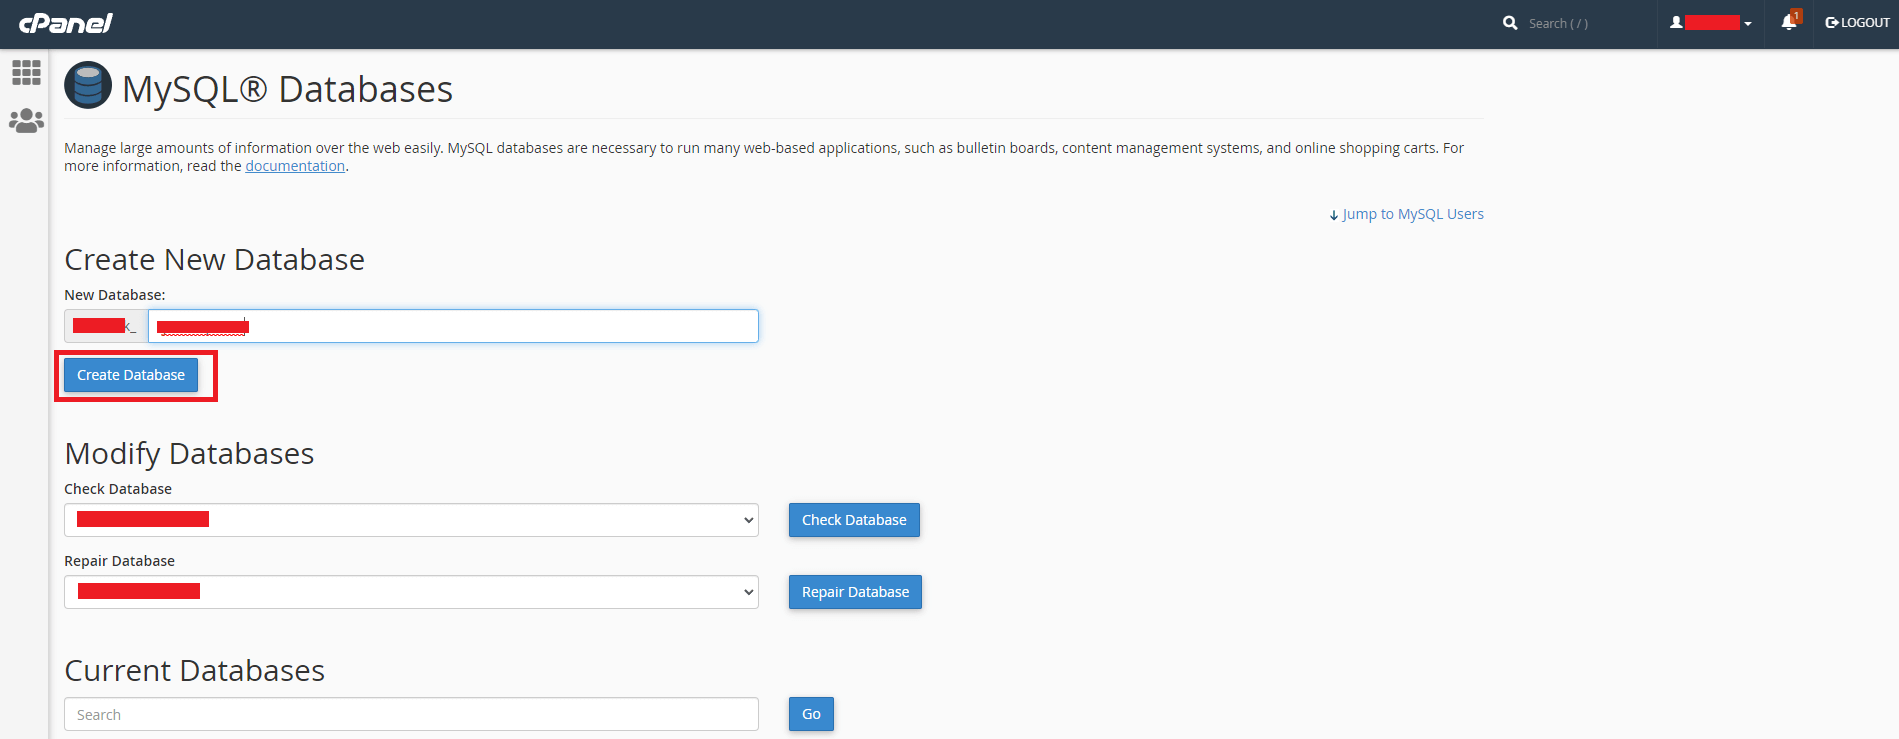
3. Enter database name and Create a new database.
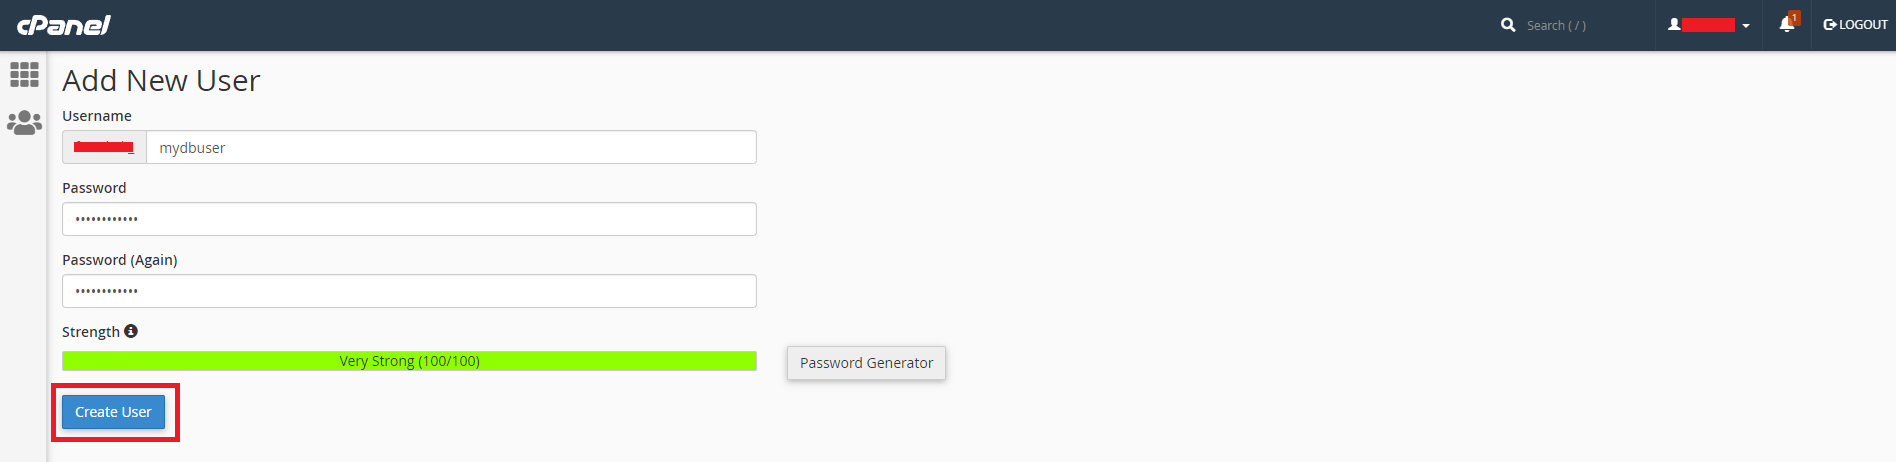
4. Create Database user.
5. Assign Database to the user.

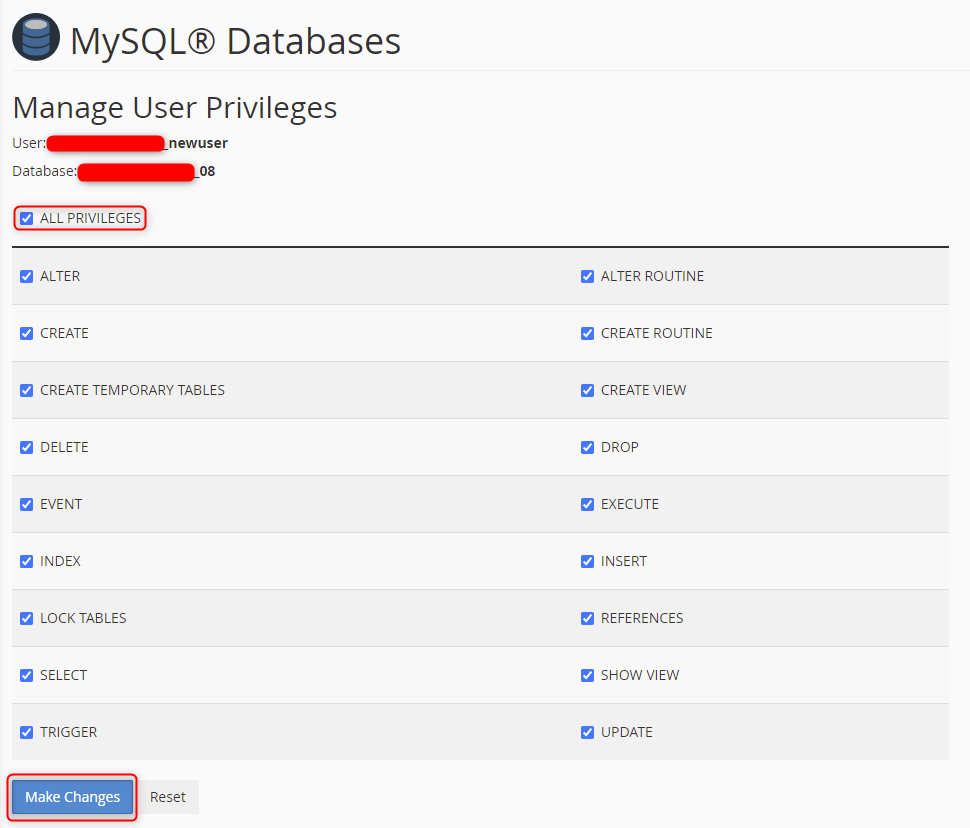
6. Manage User Privileges. (Check All Privileges)
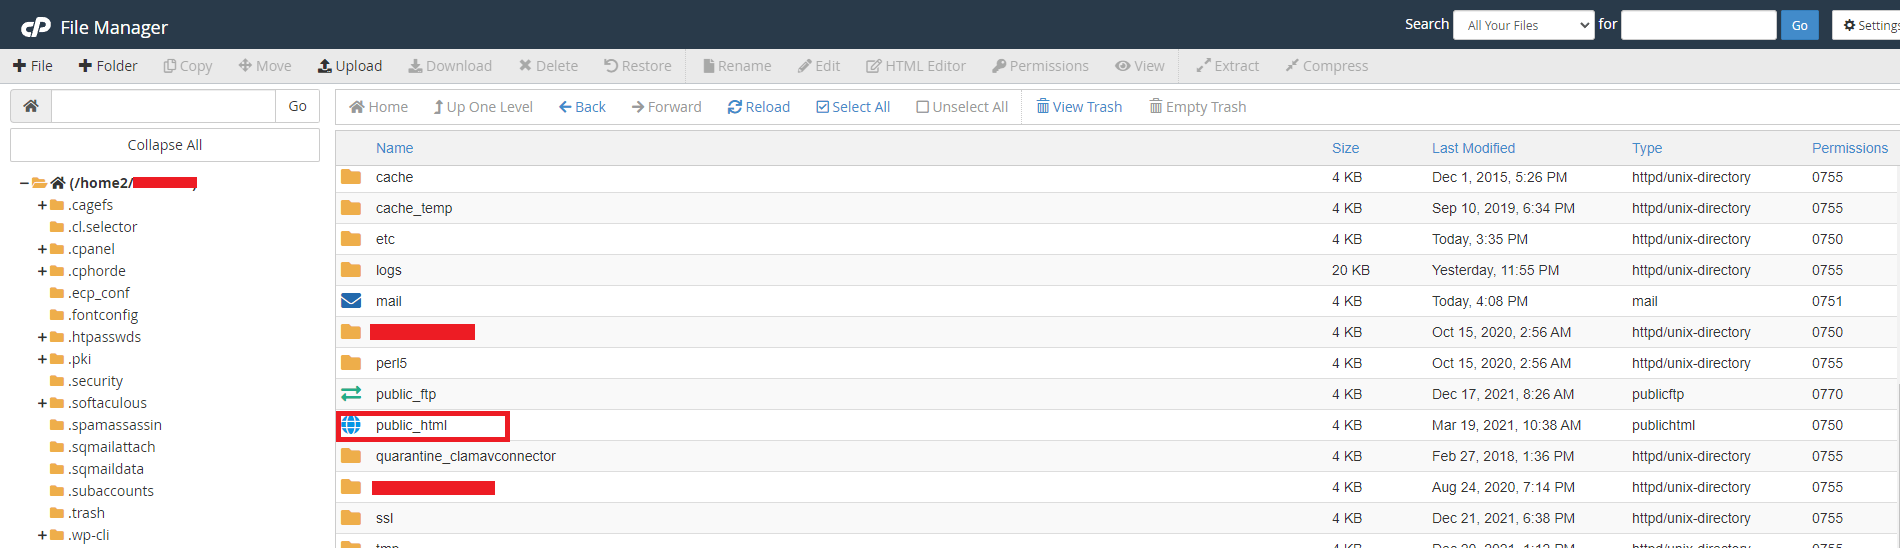
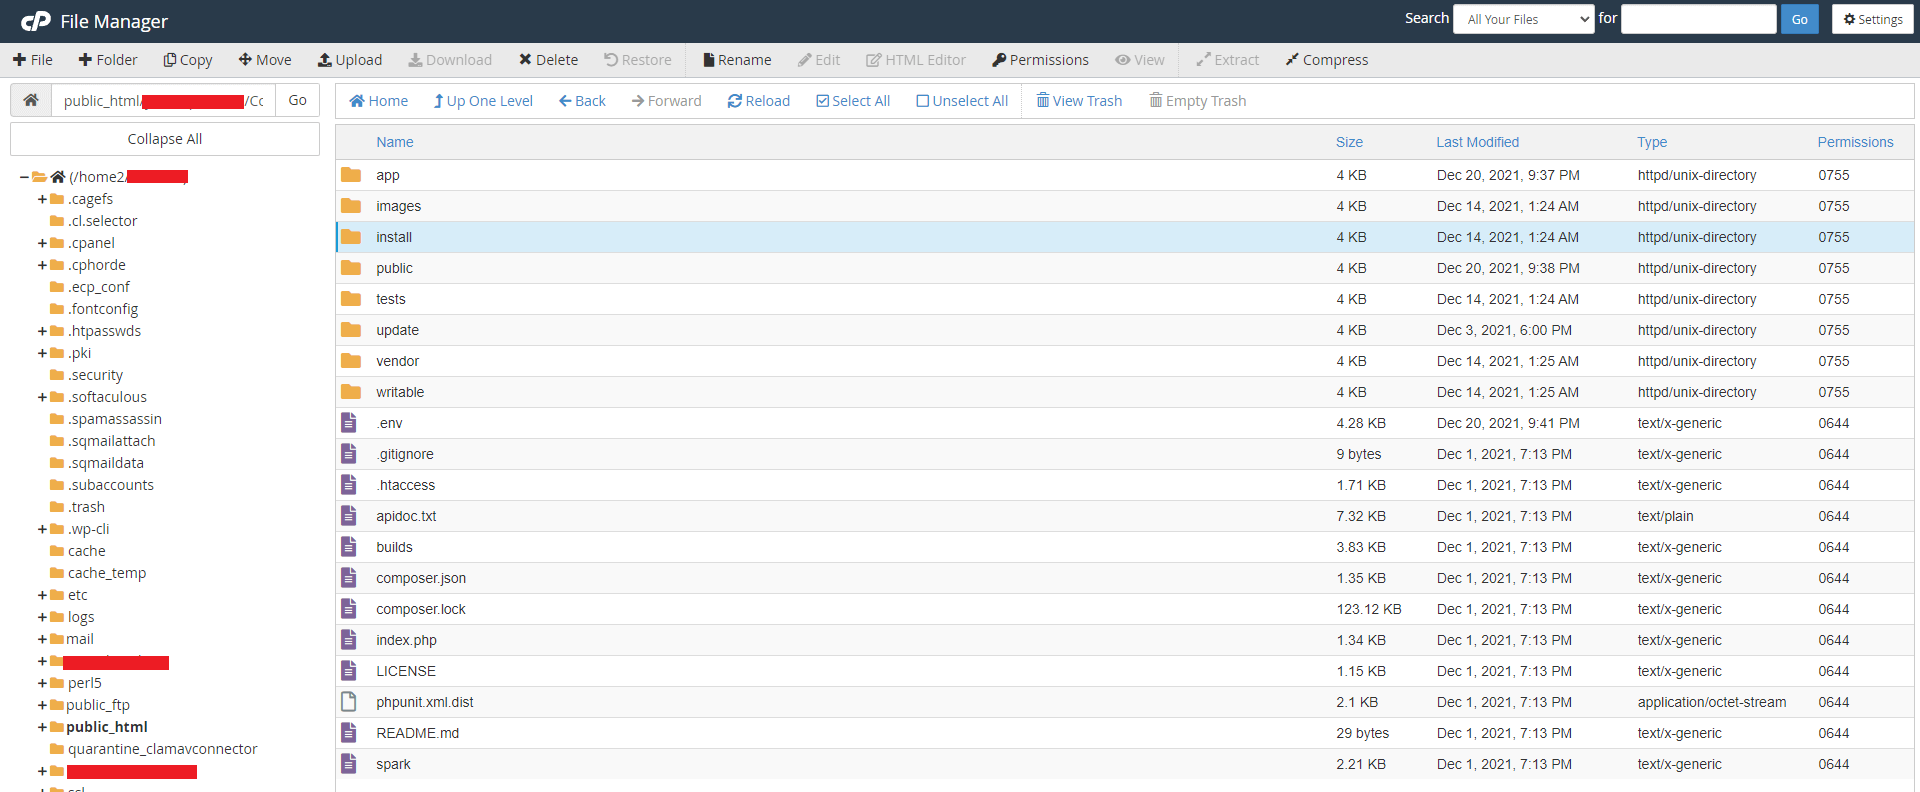
7. Open File manager now.

8. Go to public_html or public_html/yourDomain.in folder in the file manager, whichever folder your domain points to.
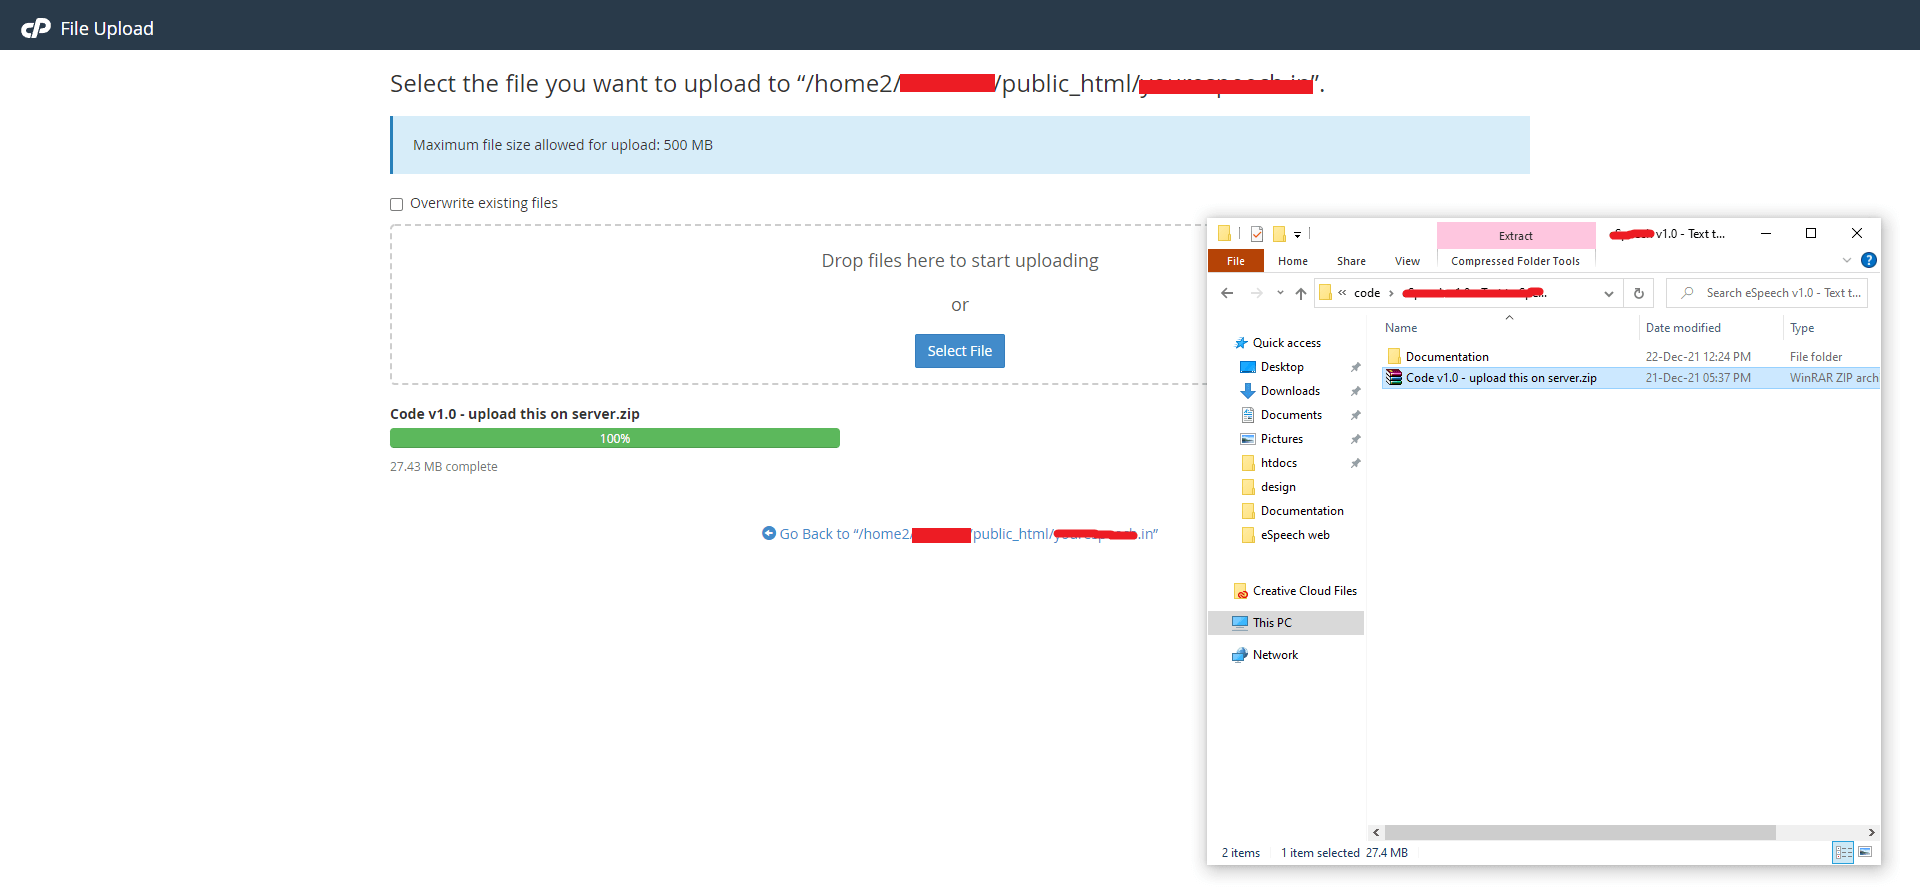
9. Upload the downloaded zip in public_html or public_html/yourDomain.in folder.
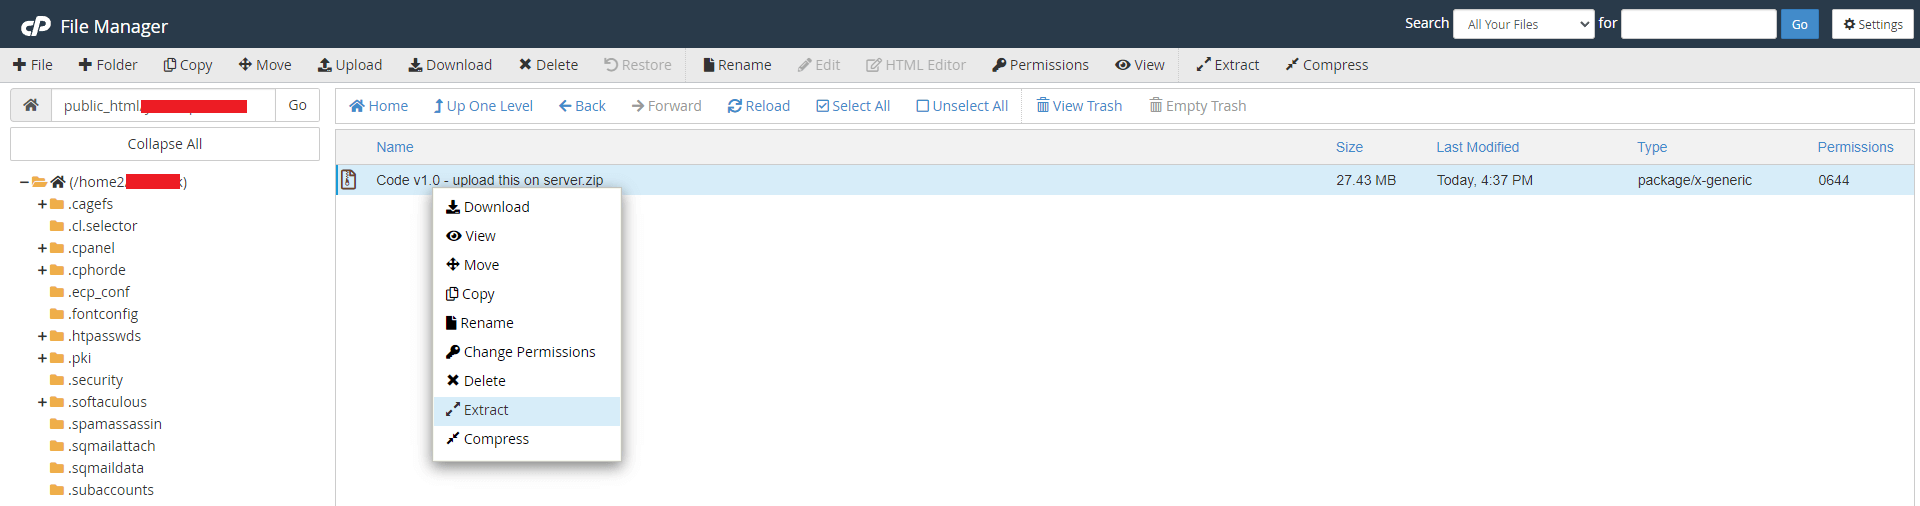
10. unzip or extract the Code vX.X - upload this on server.zip file that you have just uploaded.
11. verify that all these files are in public_html or public_html/yourDomain.in folder.
Before installing Laravel project, ensure you have the following
- PHP >= 8.2.0 (check with php -v)
- Composer (dependency manager for PHP)
- Web server: XAMPP / WAMP
- Database: MySQL
- Node.js & NPM/Yarn for build
-
Required Node.js Version: v20.x
Download from nodejs.org if not installed. -
Serve the Application:
This runsphp artisan serveartisan serveand opens your project athttp://127.0.0.1:8000(or as shown in your terminal).
Installation
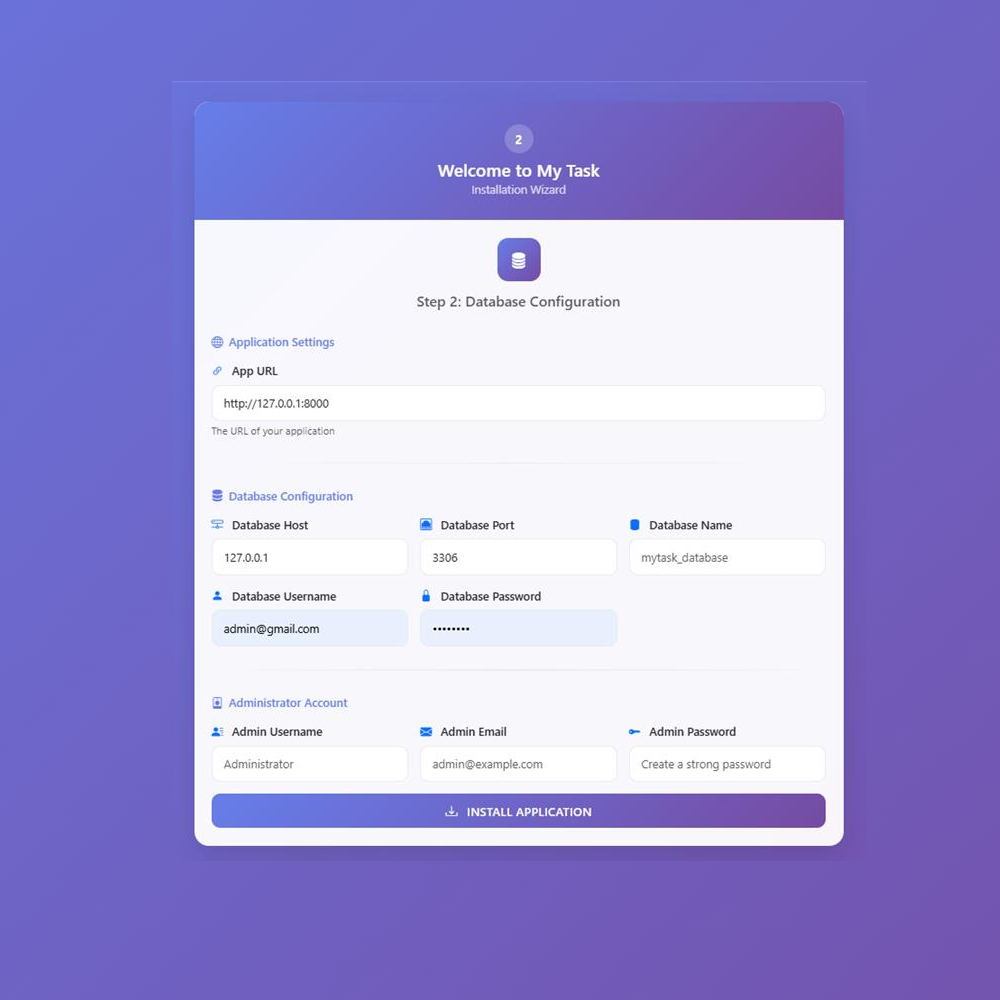
Step 1: Database Configuration
-
App Url : Enter the your app / domain url. Make sure you enter the complete URL with the correct protocol say http:// or https://
Note: Do not add / at the end of the URL (Example: https://yourdomain.com)
- Database Hostname : Put the hostname in here.
- Database Port : Enter the Port
- Database Name : Enter the database's name.
- Database User Name : Enter the database's user name.
- Database Password : Kindly input the strong password.
- Admin Username : Put in the username (User authentication will be further conducted using the username)
- Admin Email : Put in the Email (User authentication will be further conducted using the email)
- Admin Password : Put in the password number.(The password will be utilized for user authentication in the future.)
Step 2: Folder Permission Check
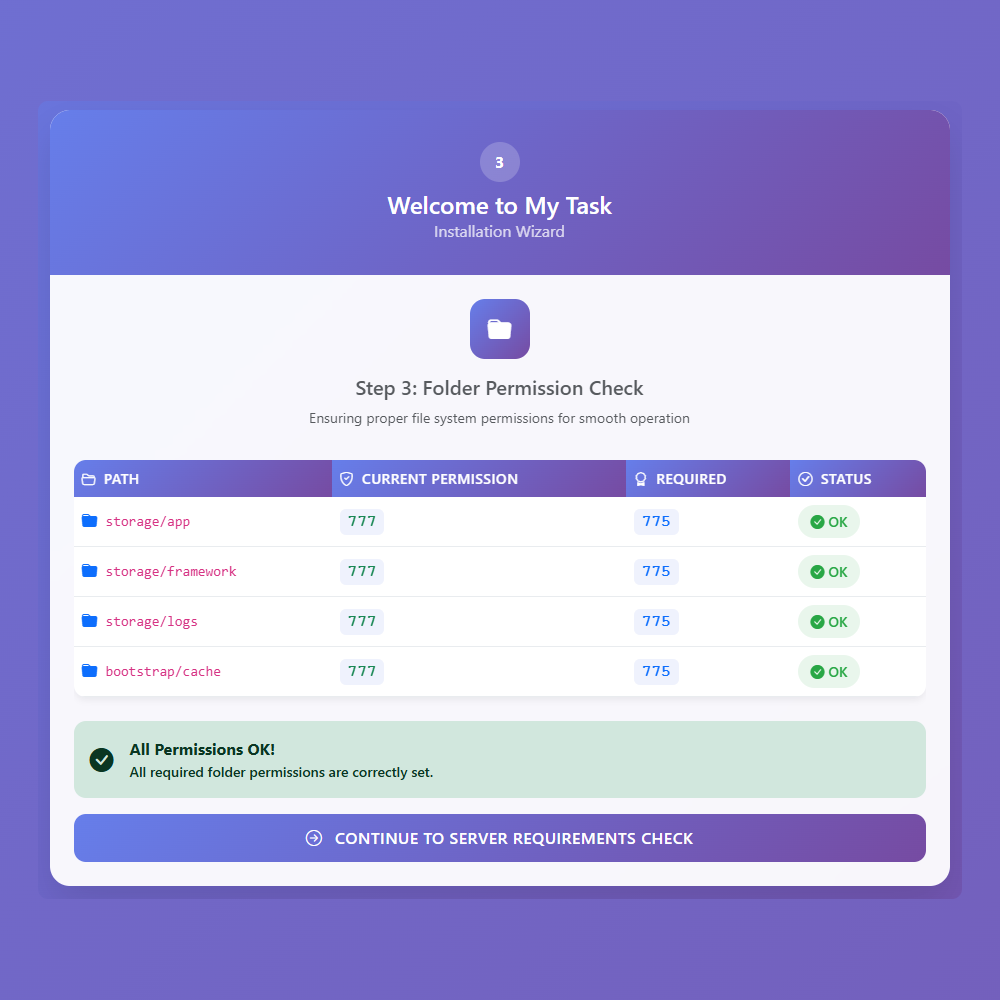
- /storage/app : Must be writable for storing uploaded files and application data.
- /storage/framework : Must be writable for cache, sessions, and compiled views.
- /storage/logs : Must be writable for application logs.
- /bootstrap/cache : Must be writable for framework cache and compiled files.
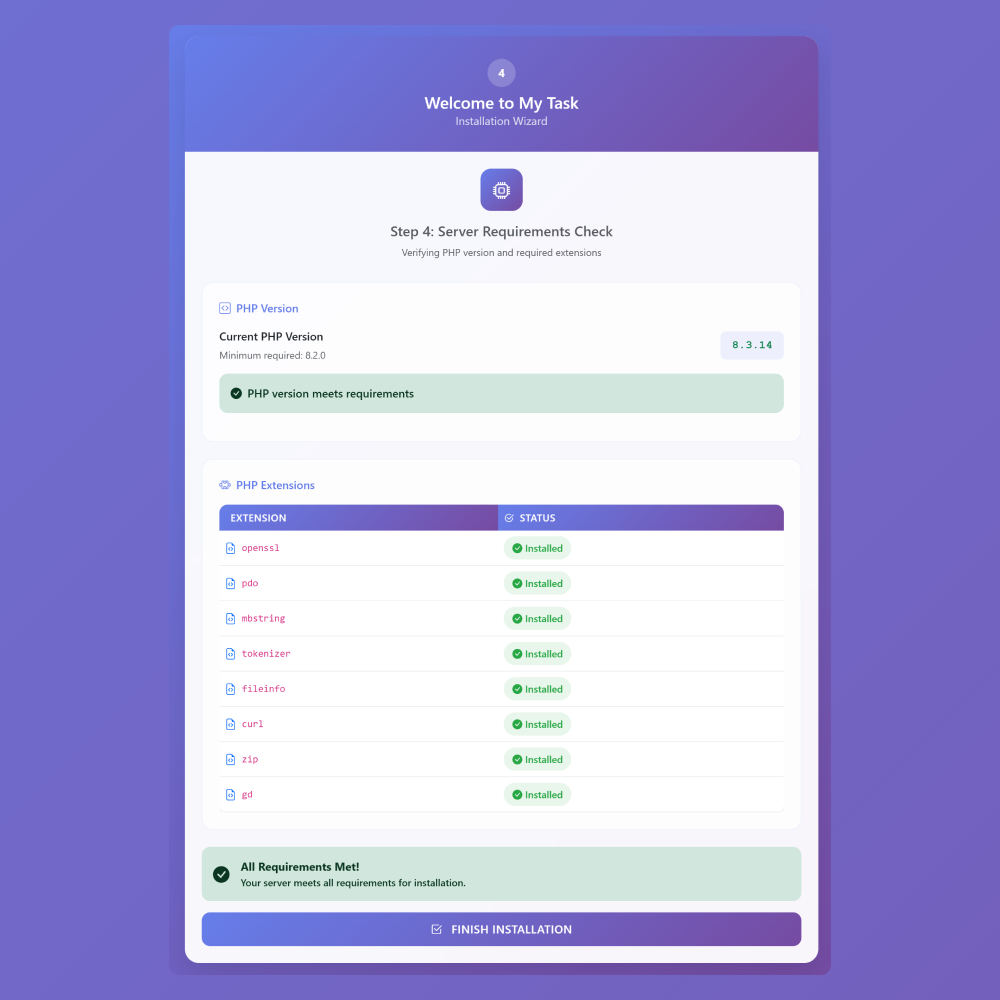
Step 3: Server Requirements
-
PHP Version : Must be 8.2 or higher.
Step: Log in to your hosting panel → Find "PHP Selector" or "PHP Version" → Select 8.2 or higher → Save. -
OpenSSL Extension : Needed for secure data.
Step: In PHP Selector → Find OpenSSL → Tick/Enable → Save. -
PDO Extension : Needed for database connection.
Step: In PHP Selector → Find PDO/MySQL → Tick/Enable → Save. -
Mbstring Extension : Needed to handle text properly.
Step: In PHP Selector → Find Mbstring → Tick/Enable → Save. -
Tokenizer Extension : Needed by Laravel.
Step: Usually enabled by default. Check PHP Selector and enable if available. -
Fileinfo Extension : Needed for file uploads.
Step: In PHP Selector → Find Fileinfo → Tick/Enable → Save. -
Curl Extension : Needed for API requests.
Step: In PHP Selector → Find Curl → Tick/Enable → Save. -
Zip Extension : Needed for archives.
Step: In PHP Selector → Find Zip → Tick/Enable → Save. -
Json : Needed for archives.
Step: In PHP Selector → Find JSON→ Tick/Enable → Save -
GD Extension : Needed for images.
Step: In PHP Selector → Find GD → Tick/Enable → Save.
Success

System Update
How can I update my web version or admin panel to the most recent version?
Note: Please update the system sequentially if you are upgrading from an extremely outdated version. Avoid skipping any of the versions.
- Important: Before updating to the new version, make sure to create a full backup of your system.
- Code Backup: Save a copy of all your website files, including customizations.
- Database Backup: Export your database using your hosting panel or a tool like phpMyAdmin.
- From the downloaded PHP source code, locate the upgrade from vX.X to vX.X.X.zip file.
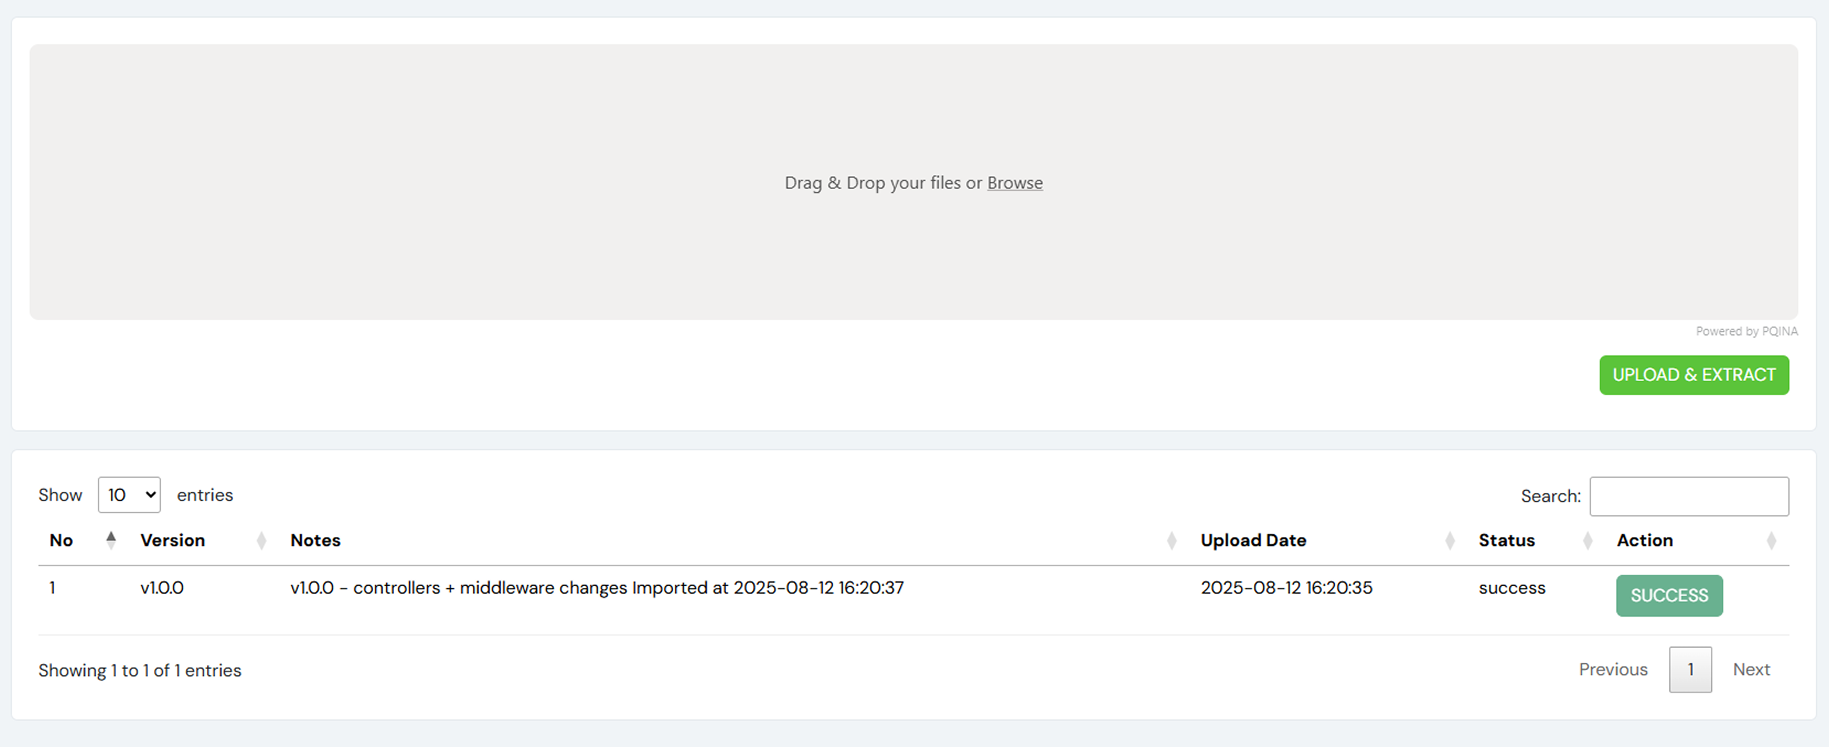
- Take a look at http://Mytask.com/admin/update
- Display the most recent version, basic instructions, and an Upload & Extract button.
- Upload the file update.zip.
- Press the Upload & Extract button.
- All done! You’ve successfully uploaded and extracted the zip file. Now, click the Import button to update your system.
- Congratulations! Your system has been successfully upgraded to the newer version.
Support
If you are facing any technical issues or challanges while using our system. You can contact us on skype. We are available for technical support from 10.00AM to 7.00PM IST Monday to Friday.
For Web or backend related issues contact here,
Contact UsSystem Flow
Login

-
Login With Admin:
- Please enter your email address. It was used during the installation process
- Please enter your password. It was used during the installation process
Mandatory Settings
Leave management
-
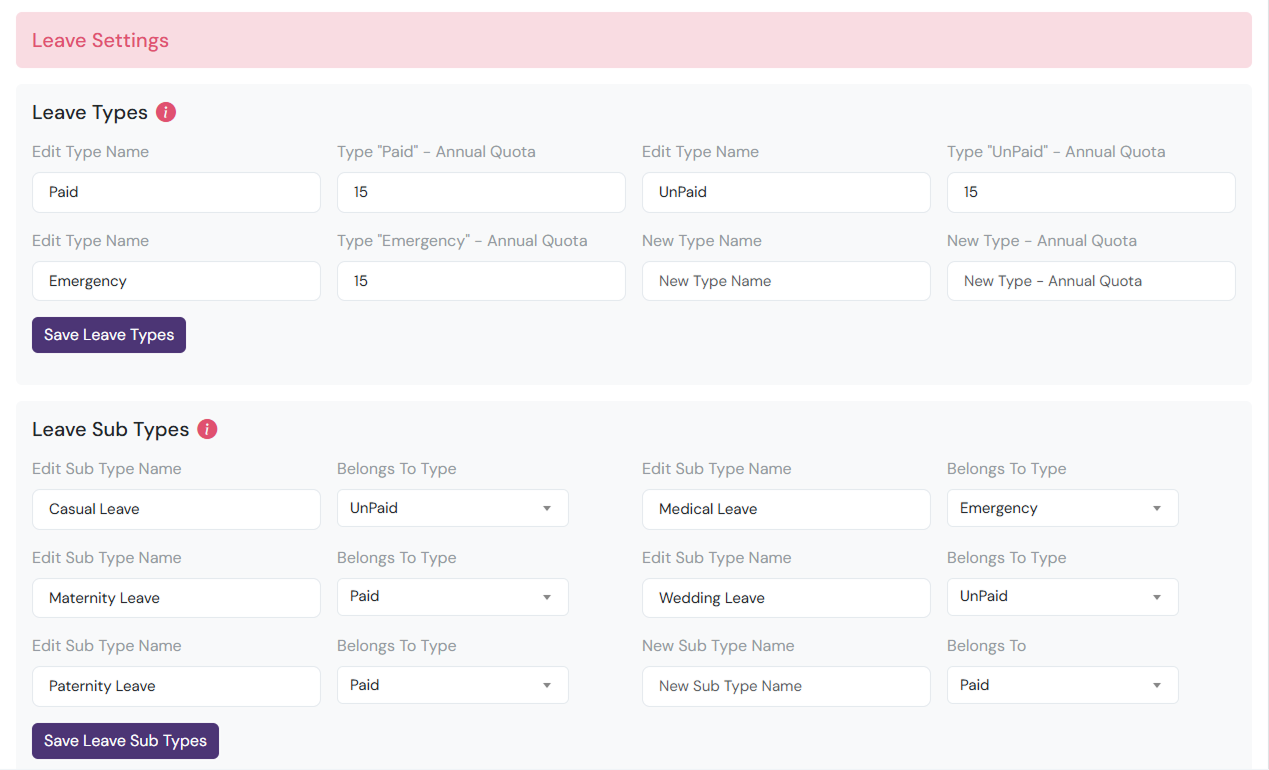
Leave Types Management:
- Define leave types for employees (Paid, Unpaid, Emergency, etc.).
- Set annual leave quotas for each type.
- Edit existing leave type names and quotas.
- Add new leave types with a name and annual quota.
- Required for managing employee leaves effectively.
-
Leave Sub Types Management:
- Define subcategories of leave types to categorize leaves more specifically.
- Assign subtypes to existing leave types.
- Edit existing subtypes and change which leave type they belong to.
- Add new subtypes with a name and link them to a leave type.
- Helps track and manage employee leaves in more detail.
Appraisal Management
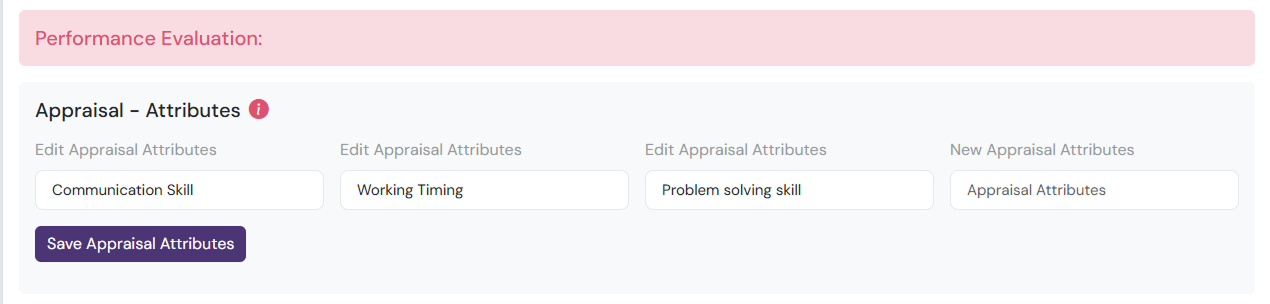
- Define performance attributes used for employee appraisals.
- Helps evaluate employee performance systematically.
- Attributes are used to score and generate appraisal reports.
- Edit existing appraisal attributes or add new ones.
- Required for structured and consistent performance appraisals.
Interview Management

- Define performance attributes used during candidate interviews.
- Helps evaluate candidates systematically and fairly.
- Attributes are used to score and compare interview performance.
- Edit existing interview attributes or add new ones.
- Ensures standardized assessment for hiring decisions.
Shift Management
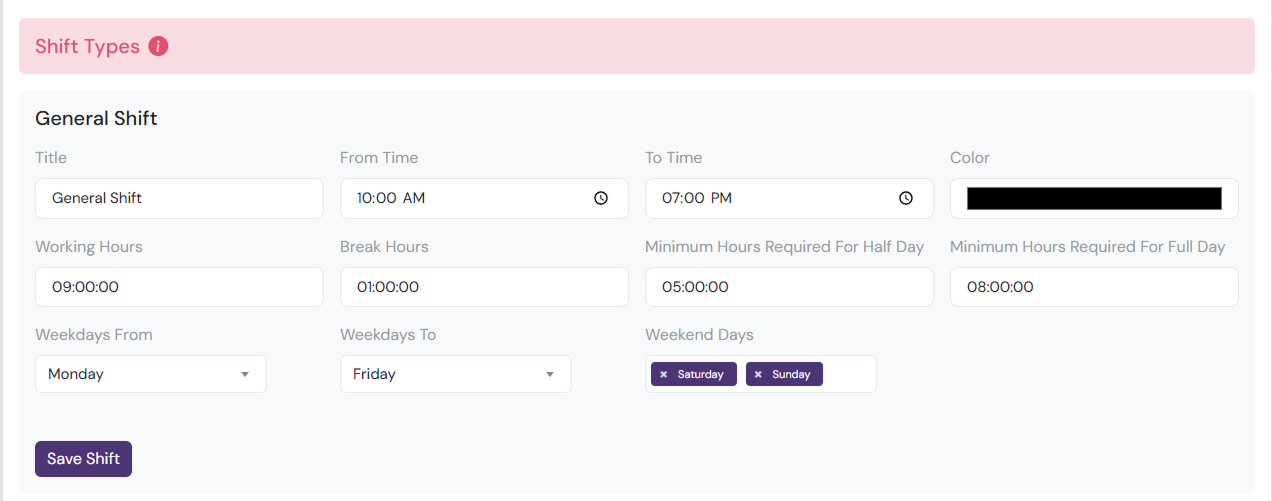
- Define working hours
- Set break times
- Minimum hours for half/full day
- Configure weekdays and weekends
- Used in salary calculation
- Manage existing shifts or add new ones
- Used for attendance clock-in/clock-out functionality
- Required to assign a shift when creating a new employee
General Setting
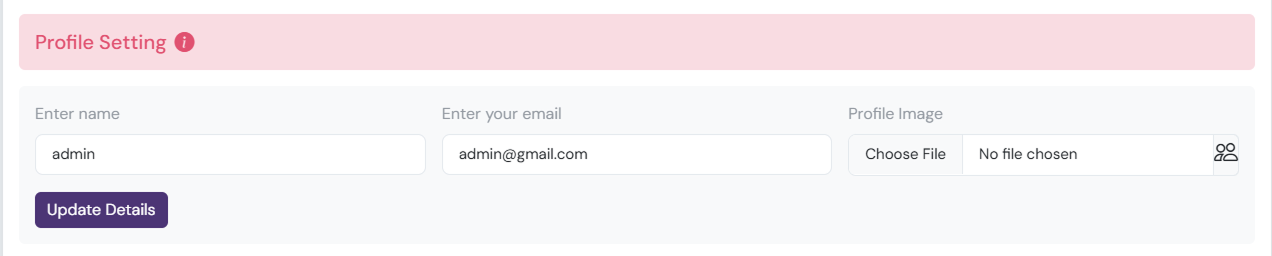
- Profile Info: Manage name, profile picture and email.
- Change Password: Update your account password securely.
Web App Settings

Web App Settings
-
Web App Title: MYTASK
- This is the name of the application displayed to users.
-
Number of Top Performers: 6
- Defines how many employees are highlighted as top performers in reports or dashboards.
-
Default Password: abcd1234
- The initial password assigned to new users when their account is created.
-
Loan Max Amount: 175,000
- The maximum amount an employee can request as a loan through the system.
-
Salary Cut Off Day: 7
- The day of the month used to calculate payroll; salaries are processed based on this cut-off.
-
Timezones: Asia/Kolkata (Indian Standard Time)
- Sets the default timezone for all timestamps, reports, and scheduled tasks in the app.
-
Default Currency: India (₹)
- Specifies the currency used for payroll, loans, and financial reports.
-
Logo (Ratio 1:1): (200*200,512*512 etc)
- The main logo of the app, displayed on dashboards and headers. Must be square (1:1 ratio).
-
Sign In Screen Background (Ratio 3:4): (300*400, 600*800 etc)
- Background image displayed on the login page. Recommended 3:4 ratio for best display.
-
Disallowed Characters: % , < , > , [ , ] , ? , ^ , # , & , * , $ , | , \ , { , }, +, =, /
- These characters cannot be used in usernames, passwords, or other text fields to prevent errors and security issues.
Mail Settings (Required for Password Reset)
-
Mail Driver: smtp
- Specifies the method used to send emails from the application. "SMTP" is the most common mail protocol.
-
Mail Host: smtp.gmail.com
- The server address used to send emails. This is provided by your email service provider.
-
Mail Port: 465
- The port number used for email communication. Port 465 is commonly used for SMTP with SSL encryption.
-
Mail Username: test@gmail.com
- The email account username used to authenticate with the mail server.
-
Mail Password: ••••••••••••
- The password for the email account. Used for authenticating with the mail server securely.
-
Mail Encryption: ssl
- Specifies the type of encryption for email communication. "SSL" ensures emails are sent securely.
-
From Email: test@gmail.com
- The email address that will appear as the sender for all outgoing emails.
-
From Name: My Task
- The name displayed as the sender in outgoing emails.
Department Management

-
Department Add:
- Add Department Name For E.g (Web Development)
- Select Department Head
Designations Management

-
Designations Add:
- Add Designation Name For E.g (Laravel Developer)
- Select Under Department For E.g (Web Development)
- Choose the color for Designations wise
- Designations Module/Permissions setup
Module/Permissions

-
Module/Permissions
- Module/Permissions Wise Setup
- There are various modules and permissions that can be configured based on user roles and responsibilities.
- There are View, Create, Update, Delete, Approval/Reject permissions available.
Add Employee

-
First Name: John
- The employee’s given name. This field is mandatory.
-
Last Name: Doe
- The employee’s family name or surname. Required field.
-
Annual Salary: 50,000
- The employee’s yearly salary, used for payroll calculations.
-
Profile: (jpg, jpeg, png, gif, svg)
- Upload the employee’s profile picture. Supported formats only.
-
Employee Manager: Jack User
- Select the manager or supervisor assigned to this employee.
-
Gender: Male / Female / Other
- Choose the employee’s gender.
-
Birth Date: dd-mm-yyyy
- Enter the employee’s date of birth in the specified format.
-
Joining Date: dd-mm-yyyy
- Provide the date when the employee officially joined the company.
-
Email ID: john.doe@email.com
- The official email address used for login and notifications.
-
Phone: xxxxxxxxxx
- The employee’s contact Number
-
Country: Afghanistan
- Select the employee’s country of residence from the dropdown list.
-
Designation: Laravel Developer
- The employee’s job title or role within the organization.
-
Shift: General Shift
- Assign the work shift (e.g., General).
-
Active Status: Activate / Deactivate
- Set whether the employee’s account is active or inactive.
-
Address: Full residential address
- Enter the employee’s complete address for records.
-
Nationality: Indian
- The employee’s nationality (optional field).
-
Religion: Hindu / Muslim / Christian etc.
- Specify the employee’s religion (optional field).
-
Bank Name: XYZ Bank
- Select the employee’s bank name for salary payments.
-
Account No: 1234567890
- Enter the employee’s bank account number for salary payments.
-
Bank Code: XYZ123
- Enter the employee’s bank code for salary payments.
-
Unique Identification Number: 1234567890
- Enter the employee’s unique identification number.
-
Description: Info about employee
- Enter a brief description of the employee.